
Welcome to Part 3 on motorcycle lighting. Previously, I gave my insights on headlight, fog lights and AUX lights. This time, I’m writing about LED turn signals. You can read the other write-ups here:
- Part 1 – LED Headlight and Fog Lights
- Part 2 – LED AUX Lights
- Part 4 – City and Parking Lights
Factory Turn Signals
The factory turn signals usually are ugly chunks of cheap plastic with incandescent bulbs. The ones on the Versys-X were no different. There are mounted to the chassis with a rubber “damper” to absorb vibrations and shocks. The damper is the weak spot, as it breaks easily. I was priding myself for keeping all 4 turn signals intact, despite having ridden 30+k km… But, as luck would have it, I inadvertedly hit one and the damper broke…
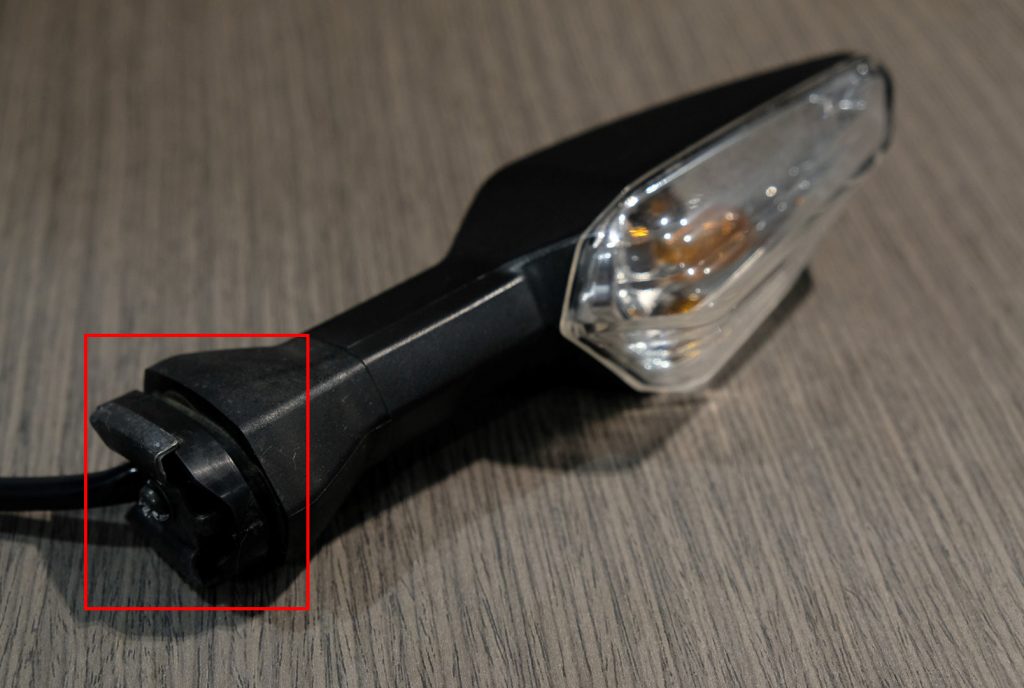
Naturally, I contacted Kawasaki for a replacement damper. It turned out that this part is not sold separately. Instead, you’ll have to dig deeper into your pocket and buy a new turn signal… When they told me the price, I kindly declined and cried myself to sleep.
LED Turn Signals
I wasn’t planning on upgrading, but I couldn’t get myself to shell out 40$ for one single turn signal. So, I started browsing on AliExpress. I typed “motorcycle LED turn signal” in the search box, and got more than 44,000 search results… Buying turn signals got a whole lot more complicated.
So I decided to hit a few local stores. I was appalled by the quality of the turn signals I found there (cheap plastic, molding defects, misaligned LED chips, ugly designs, you name it…). Luckily, I stumbled on a set of Honda OE LED turn signals. These turn signals can be found on many Honda bikes, from the CB150R to the CB1000R and many other bikes. what I love most about these turn signals is that they look similar to the Kawasaki Z1000’s. Ideal to retain a somewhat “factory” look.
See below: Kawasaki’s Z1000 turn signal on the left and Honda’s CB1000R turn signal on the right.


The Honda turn signals are rated at 3.4W each, significantly less than the 10W incandescent bulbs. For comparison sake, the Z1000 turn signals are rated at 3.5W each. Even though there is only a single LED in the housing, the magnifying effect of the lens makes them brighter than the stock units. Overall, fit and finish is great. They feel much more solid than any aftermarket turn signals I got my hands on. All in all, not a bad deal for US$35.
Parts
Installing turn signals is fairly straight forward. Besides the turn signals, you’ll also need the following parts:
- Mounting brackets: Chances are that you’ll need some mounting brackets (adapters) to fit aftermarket turn signals on your bike. These brackets usually are brand or bike specific. Do your homework and make sure you buy the correct ones.
- LED Flasher: This one is optional. We’ll get back to that later.
- Electrical Supplies: All the small stuff, such as electrical cables and tape, insulated spade connectors, etc. Keep it all within a hand’s reach.
Installing the Turn Signals
First of all, you need to remove the factory turn signals. This might involve removing a few other parts depending on your bike, such as the fairings, covers and other bits and bobs. The turn signal itself is removed by undoing one single bolt or screw.
To fit aftermarket turn signals, you’ll need a set of mounting brackets. Depending on the application, these are available in plastic or metal. These brackets have only one hole, as the wiring of aftermarket turn signals usually is located inside the mounting bolt (example). More often than not, factory turn signals are designed differently, requiring a separate hole to pass through the wiring.
To make everything fit, I widened the hole for the bolt and then I drilled a second hole for the wiring. Once the brackets fitted to the turn signals, I superglued the turn signals onto the brackets.


Wiring turn signals is simple. There are 2 wires: one positive and one negative. The color coding of the wires did not match the Versys’ stock wiring. Usually, if you accidently inverse the polarity, the turn signal will not work, but it won’t necessarily cause any damage. But it’s always better to get it right from the start, so document yourself!
When the wiring is done, it’s simply a matter of bolting in the turn signals. I just had to add a bigger washer, as Honda’s small washer went straight the hole of the bracket.


Installing the Relay
This applies to bikes which use a relay to control the blinking of the turn signals. Most bikes still do, although manufacturers are switching to CAN bus systems on their higher-end models, in which a ECU is in control of most systems on the bike, including the turn signals.
If your bike was fitted with incandescent bulbs from the factory, you’re likely to experience “hyper flash” when fitting LED turn signals. LEDs draw such little power that the turn signal relay thinks one of the bulbs is blown (safety feature). The most common ways to deal with this problem: (1) add load resistors to increase the load on the circuit or (2) replace the relay with thermal relay, compatible with LED bulbs.
Usually, replacing the relay is the easiest solution, as it is plug and play. Adding in load resistors requires hacking up the factory wiring. Just a word of caution, make sure you wire up the flasher correctly, because inverting the polarity could damage its internal circuit…
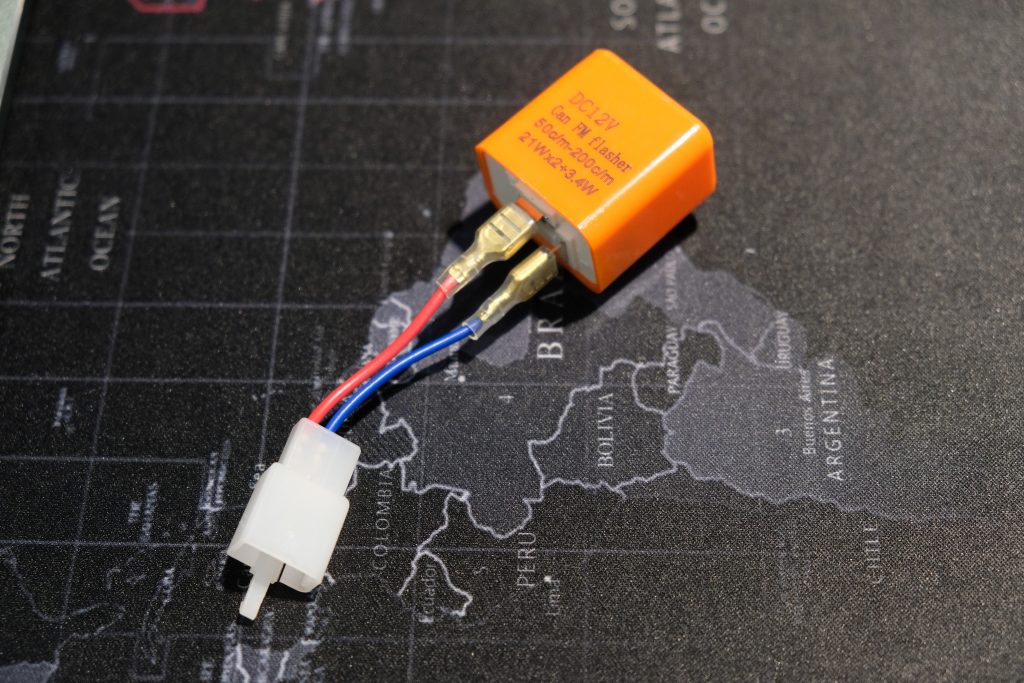
The relay I bought came already pre-wired and plugged directly into the stock wiring harness. Easily reversable in the future, if need be.
Pictures
Here are some pictures of the turn signals installed. They are significantly smaller than the factory ones and, as a result, they are recessed into the bodywork. However, this will keep them out of harm’s way when things do go sideways. Last but not least, they give the bike a more premium look, with power savings as an added bonus.


Power Savings
So far, I have upgraded the headlight bulb and the turn signals, and added a pair of powerful spot lights. At this point, I might as well convert the remaining bulbs to LEDs (plate light, city lights and tail light).
We all like to farkle up our bikes according to our taste and needs. But farkels need power. Especially on lighter bikes with smaller alternators, you need to make sure there’s enough juice to power everything, on top of keeping the battery fully charged. With an output of only 294W, the LED conversion has a huge impact on the available power…
Below you can see the comparison between the factory power consumption and my current power consumption. I have added 80W of consumption for the spot lights. Yet, the overall power consumption is only 12W higher than stock. Thanks to the LED conversion, there still is about 45W available.
I’ll do a final update in Part 4, when I will have completed the LED conversion.
| Item | Qty | WATTS (before) | AMPS (before) | WATTS (after) | AMPS (after) |
|---|---|---|---|---|---|
| Headlight | 1 | 60 | 4.29 | 18 | 1.29 |
| Fog Lights | 2 | 16 | 1.14 | 16 | 1.14 |
| Spot Lights | 2 | 0 | 0 | 80 | 5.71 |
| City Lights | 2 | 10 | 0.72 | 10 | 0.72 |
| Taillight | 1 | 21 | 1.50 | 21 | 1.50 |
| Turn Signals | 4 | 40 | 2.86 | 14 | 1 |
| License Plate light | 1 | 5 | 0.36 | 5 | 0.36 |
| EFI | 1 | 35 | 2.50 | 35 | 2.50 |
| Dashboard | 1 | 15 | 1.07 | 15 | 1.07 |
| Radiator Fan | 1 | 14 | 1.00 | 14 | 1.00 |
| Horn | 1 | 21 | 1.50 | 21 | 1.50 |
| TOTAL | 237 | 16.94 | 249 | 17.79 |